This is a step-by-step guide on how to handle audio prompts (recordings) used within an Interactive Voice Response (IVR) system.
Note: You must have a custom IVR in place—scripted by Simtex staff—in order to make use of the Audio File Management portal.
Audio Slots vs. Audio Files
Audio slots are used to link audio files to services such as IVRs or music on hold. Each has a “type,” which can be either prompt or music on hold.
For example, you may have an audio slot (prompt) called Main Menu. After uploading the main-menu.wav audio file, you then configure the audio slot to point to the main-menu.wav audio file.
Currently, audio slots with a type of prompt are created by Simtex while we set up and configure your custom IVR.
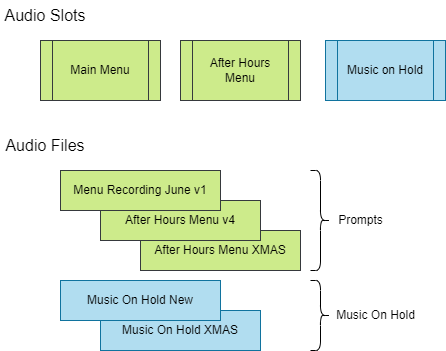
Each audio slot points to an audio file, as shown:

Uploading Audio Prompts
We recommend starting by uploading the audio files that you want to use for the various parts of your IVR. Uploading the files is an easy process, and our system will automatically convert them for you.
- In our portal, click Audio across the top, then select Audio Files.
- Click the Upload button on the right-hand side.
- Enter a meaningful Name that relates to the purpose of the prompt, such as Main Menu, Busy Greeting, or Daytime Voicemail Greeting.
- Ensure the Type is set to Prompt.
- Find the audio file you want to upload, drag it to the window, or click Click to Upload.
- Click Save, and your audio file will be uploaded and converted, ready to use with an audio slot.

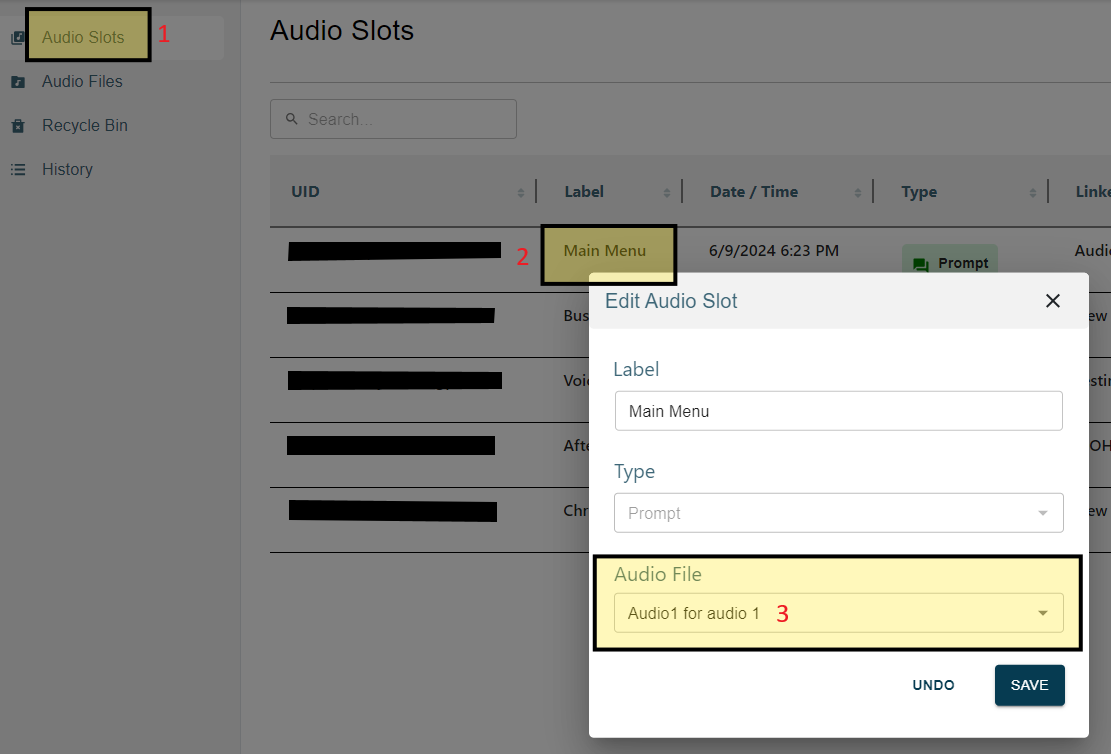
Linking Audio Files to Slots
Linking audio files to a slot is how you map any given audio file and apply it to a service such as an IVR or music on hold.
The slots are normally static—the slot stays the same, but the associated/linked audio file can be easily changed.
- Go to the Audio Slots page.
- Select the Audio Slot for which you wish to change the audio file.
- Select the new Audio File from the drop-down menu and click Save.