
Introduction
This is a step-by-step guide on how to handle custom Music on Hold (MOH) as part of our Cloud PBX platform.
Custom hold music will play when an inbound or outbound call is placed on hold using your softphone or desk phone.
Upload Audio Files
We recommend starting by uploading the audio files that you wish to use for your music on hold.
Uploading the files is an easy process, and our system will automatically convert them for you.
- Within MyCloudVoIP portal, click Audio across the top, then select Audio Files.

- Click the Upload button on the right-hand side.
- Enter a meaningful Name for your hold music – Buy-A-Car November Hold
- Ensure the Type is set to Music On Hold.
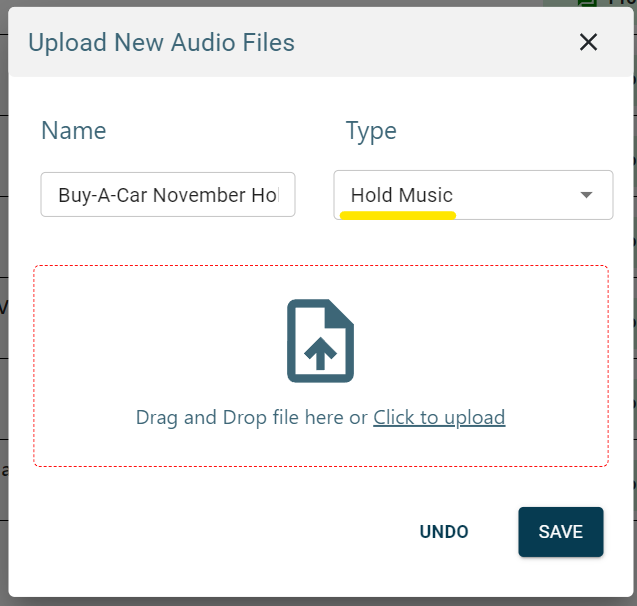
- Find the audio file you want to upload, drag it to the window, or click Click to Upload.
- Click Save, and your audio file will be uploaded and converted, ready to use with an audio slot.
Creating Audio Slot
You will need to create an Audio Slot which is a container pointing to your recently uploaded Audio File.
NOTE: This only needs to be performed once, not each time you change your hold music.
- On the left click Audio Slots.
- Click New on the right.
- Type in a meaningful Name for your entry, and select Hold Music for the Type
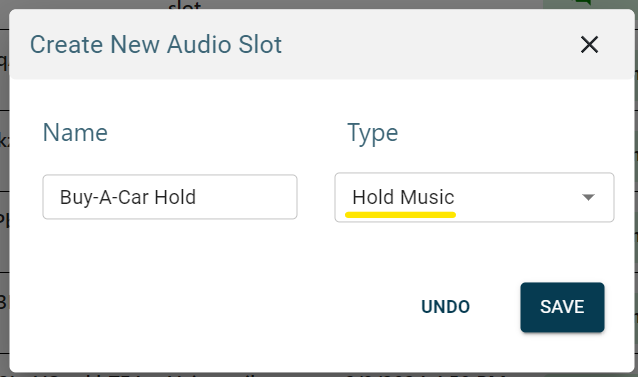
- Hit Save, then press the Edit button on the right of the newly created slot (you can also click the Label)
- Select the Audio File you uploaded in the above
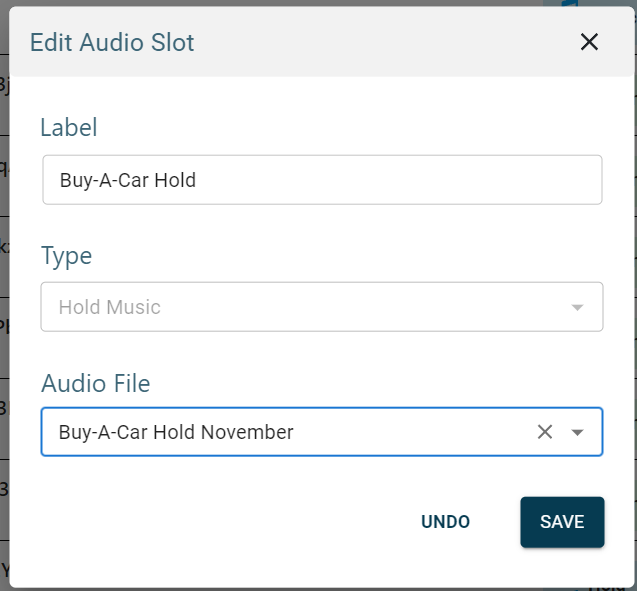
- Hit Save
Configure Custom Audio Selection
NOTE: This only needs to be performed once, not each time you change your hold music.
- Go to Subscriptions across the top and select the Call Director or Cloud PBX extension you wish to set custom music on.
You will likely need to configure this for all your phones and Call Director accounts. - Next to Audio Selection, pick the desired Audio Slot
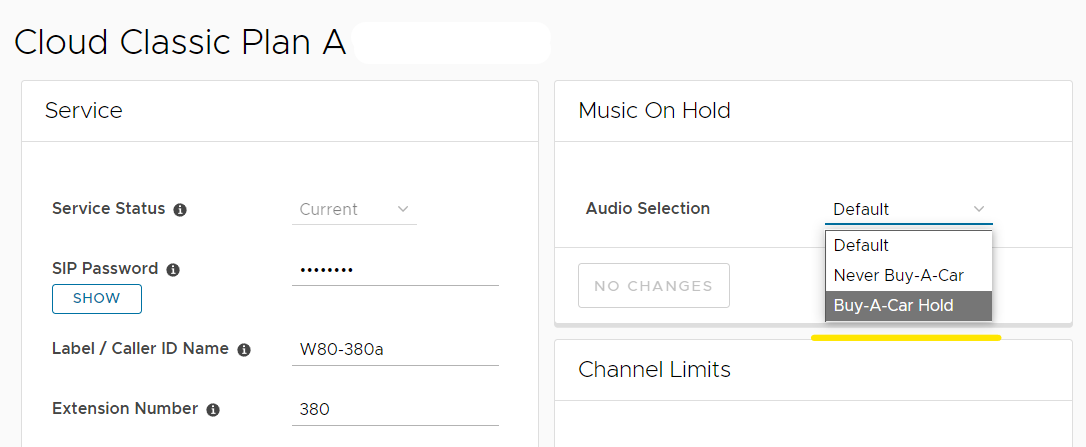
- Press Save – note changing this can sometimes take a couple of minutes to update on our back-end.
Future Changes to Music On Hold
Simply edit the Audio Slot and point it to a new Audio File (link).
Firstly, upload the new Audio File.
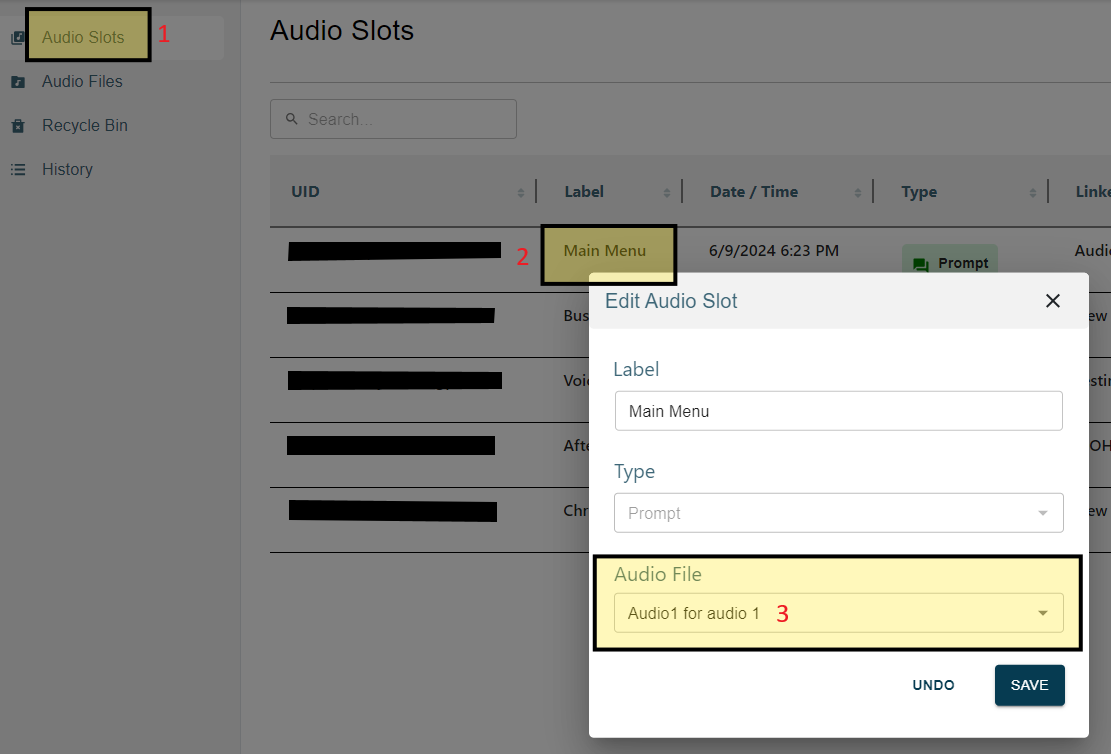
- Go to the Audio Slots page.
- Edit the appropriate Audio Slot
- Select the new Audio File from the drop-down menu and click Save.
Audio Slots vs. Audio Files
Audio slots are used to link audio files to services such as IVRs or music on hold. Each has a “type,” which can be either prompt or music on hold.
For example, you may have an audio slot (prompt) called Main Menu. After uploading the main-menu.wav audio file, you then configure the audio slot to point to the main-menu.wav audio file.
Currently, audio slots with a type of prompt are created by Simtex while we set up and configure your custom IVR.
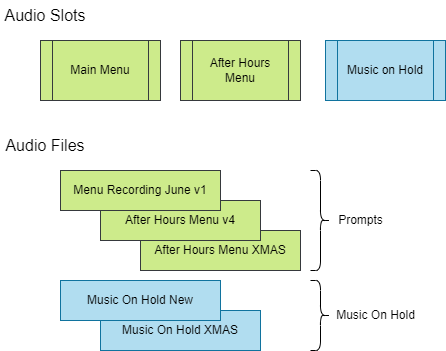
Each audio slot points to an audio file, as shown:
