3CX is a is a widely used, stable and has feature-rich graphical user interface.

Our guide assumes you have already set the server up, and have the web-based GUI up and running.
Download 3CX from the follow link 3CX
Trunk Configuration
To get things started a Trunk needs to be added to 3CX to be able to make and receive calls to the outside world.
With a variety of business grade pay-as-you-go or unlimited SIP Trunk options, we’ll have you saving money in no time. Click here for more info…
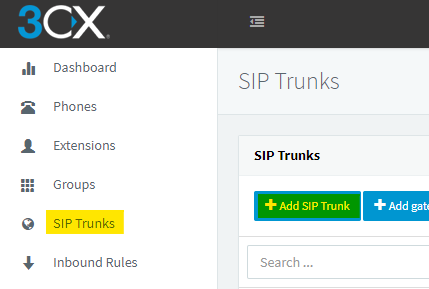
- Click SIP Trunk on the left main menu then add SIP trunk
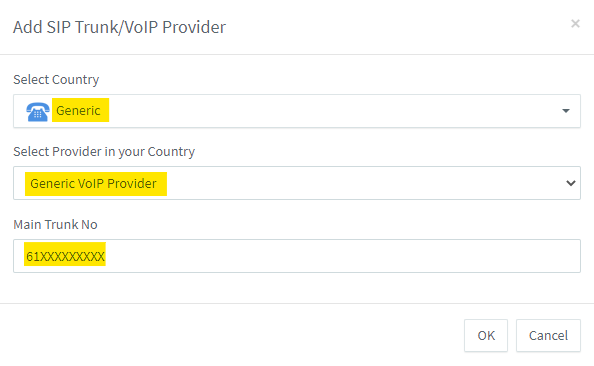
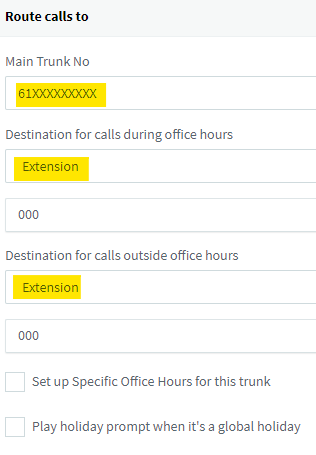
Select Generic Country and Generic VoIP Provider then for Main Trunk Number enter your Primary number into the popup window as per below.
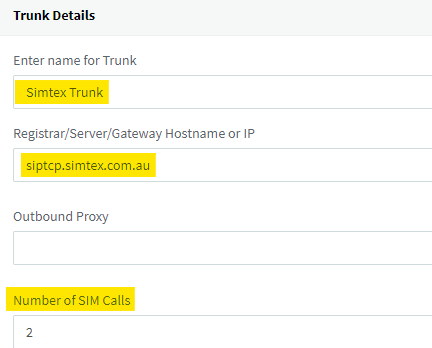
- Trunk Details
To Set up the trunk the following details will need to be entered:
Trunk Name: Simtex Trunk
Registrar/Server/Gateway Hostname or IP: siptcp.simtex.com.au For West coast customers or siptcpeast.simtex.com.au For East coast customers
Auto Discovery: leave enable
Number of SIM calls: Total number of combined inbound and outbound Simtex channels
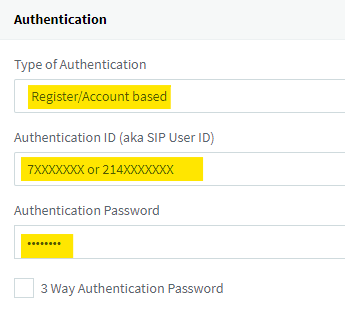
Authentication: Type of Authentication: Register/Account based
Authentication ID: Your Simtex account number, eg 711111111
Authentication Password: Your Simtex SIP password
Set up a Route for the Main Trunk Number, the destination can any on the list provided.
Also go the option tab, then in the Codec Priority section make G.711 A-law the first priority.
Outbound Routes
If you do not wish to make international calls, leave out the 0011 route pattern. To save yourself from grief later down the track, configure a prefix to route all external calls. In Australia, we use 0 as a standard. This will ensure internal numbers will never overlap external destinations.
- Click Outbound Rules on the left hand side then select add.
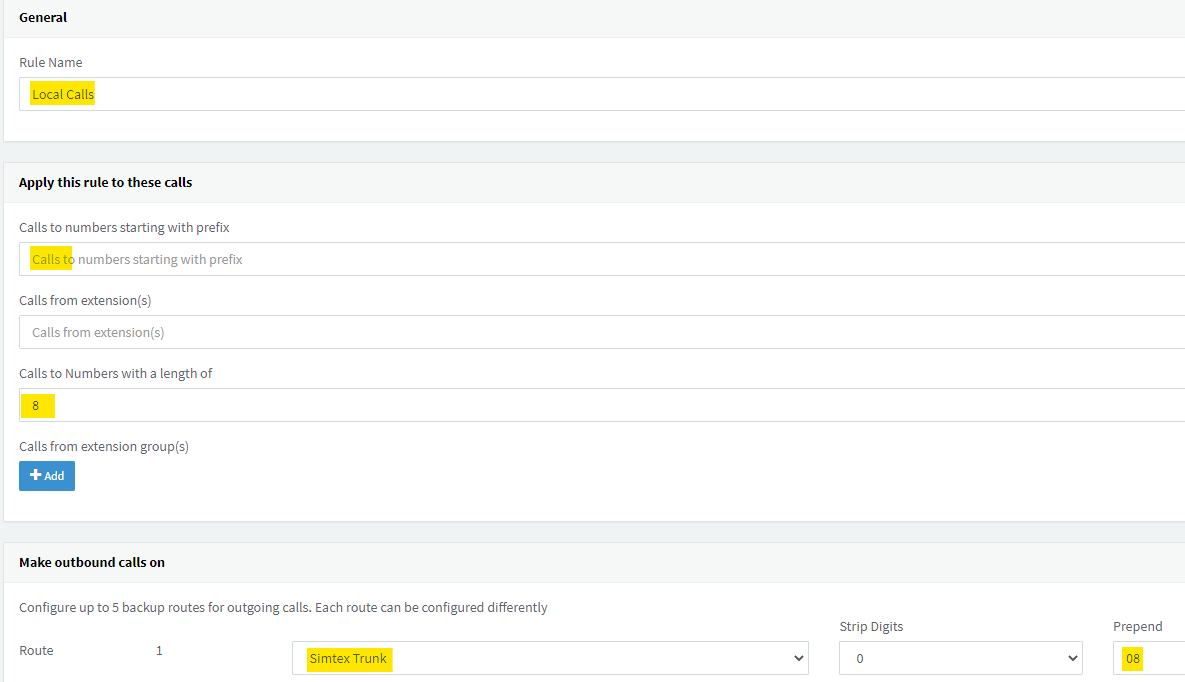
Rule Name: Label your entry
Calls to numbers starting with prefix: Enter the starting digits of the numbers you would like to call
Calls to Numbers with a length of: Length of number
Next select the Route to use for this rule, in the drop down will be the Trunk you have set up above.
Prepend: In this case we are setting up the call PBX in Perth Australia and 08 is the local area code. For example in NSW you would prepend 02 and VIC 03.
An example configuration for Perth Australia:
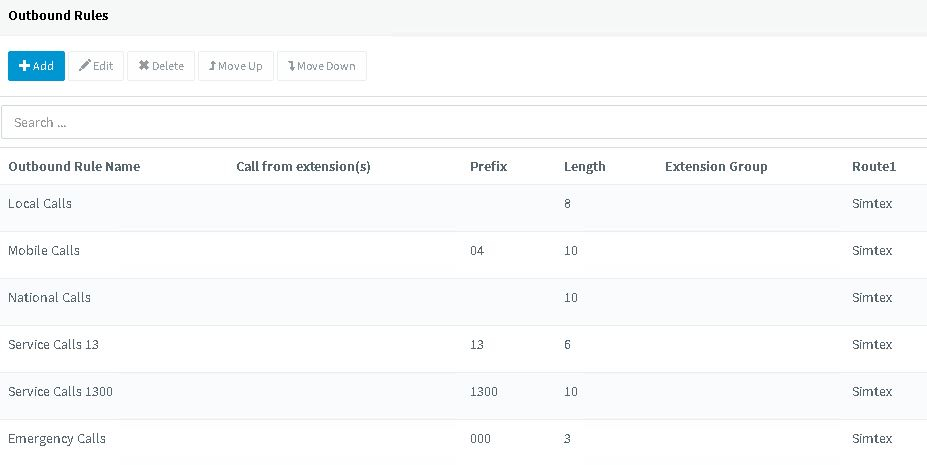
If you wish to have a number that you dial such as 0 before being able to an outgoing call you will need to set up the Prefixes and Strip Digits appropriately.
Inbound Routes
Inbound routes are used to direct incoming calls to your allocated DIDs. You can have individual numbers go to different extensions, groups, IVR routines etc as you wish.
- Click Inbound Rules on the left menu then Add DID rule.
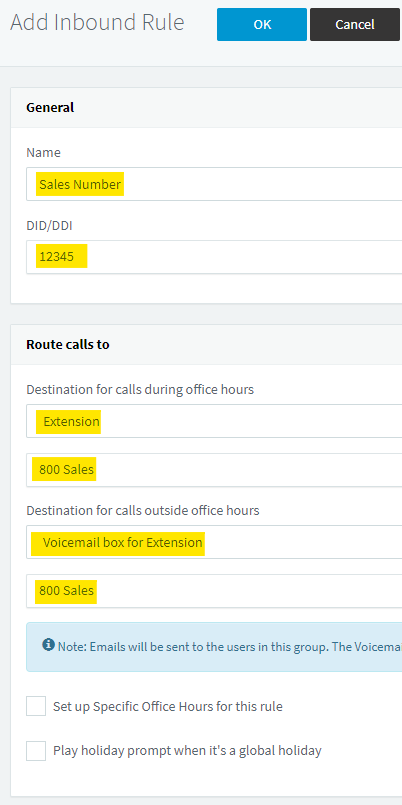
Enter a Descriptive name for the rule
Select the DID to use for the rule
For the Destination of calls in the example below we have set up a ring group Sales under the Ring Groups section and we are able to select this as a destination under extensions.
You are also able to select to have the call go to a different destination out side of hours.
CallerID can be set at a global level in your trunk configuration however you can override this setting at the extension level, if the extension needs a unique caller ID number. To configure the extension’s caller ID number follow these steps:
1. Select “Extensions” from the left tree menu
2. Double-click on the desired extension
3. Enter the desired caller ID number in the “Outbound Caller ID” field.
