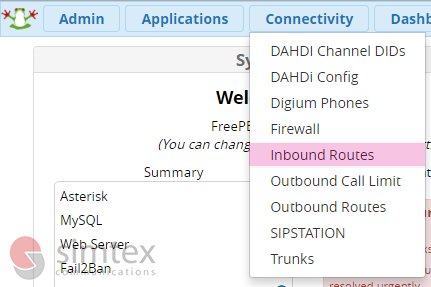
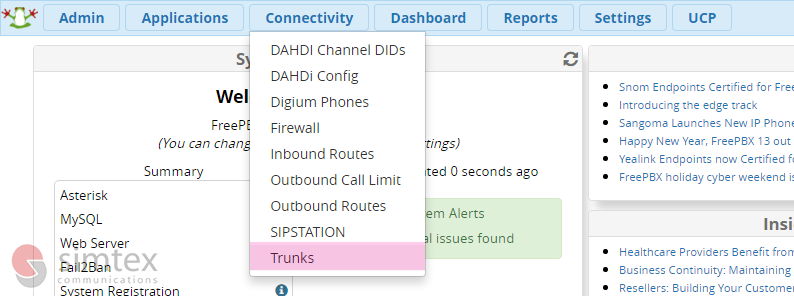
1. Open Connectivity Menu, select Trunks
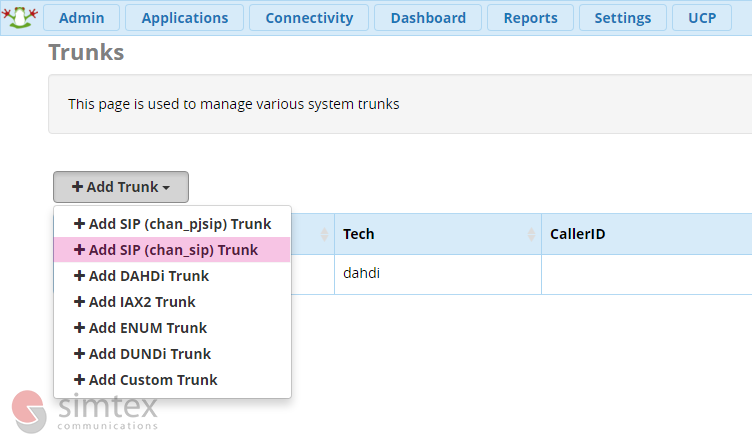
2. Select SIP Trunk (chan_sip)
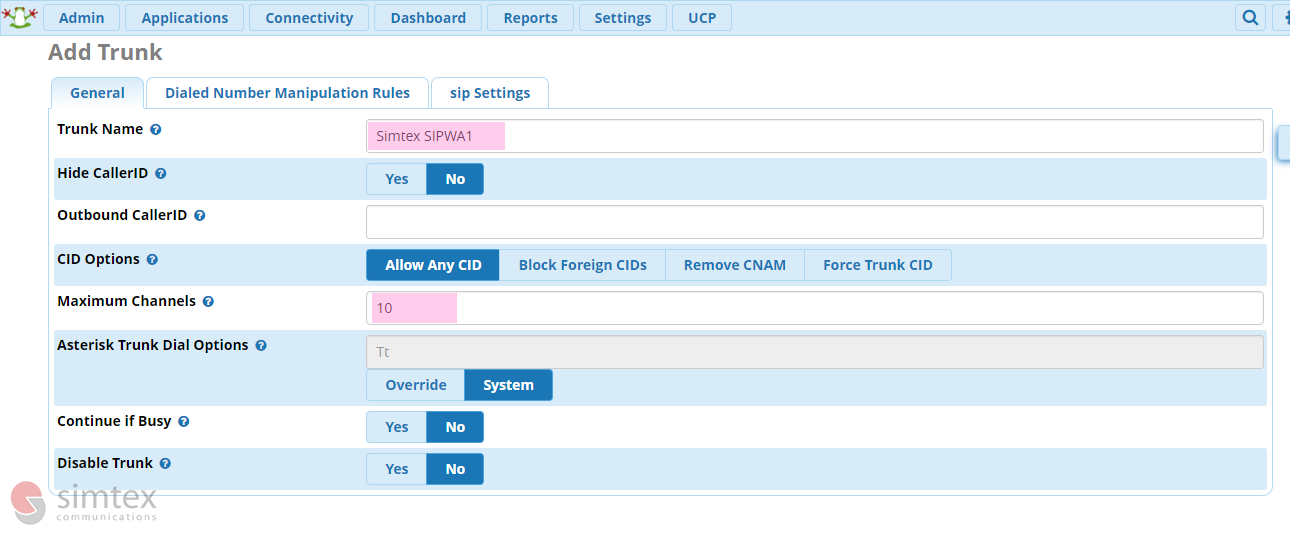
3. Label your SIP Trunk, specify number of channels
For security reasons, it’s best to limit the quantity of channels to the amount you will actually need in day to day use
4. Click on SIP Settings tab

5. Enter Trunk Details
Populate the peer details depending on the Simtex server you are currently setting up

Trunk Name: Account Number-Server – eg 7xxxxxxx-SIPWA1
PEER Details:
username=7xxxxxxx
type=peer
secret=xxxxxxxx
qualify=1000
insecure=port,invite
host=sipwa1.simtex.com.au
fromuser=7xxxxxxx
trustrpid=yes
sendrpid=yes
Replace host=sipwa1.simtex.com.au with the appropriate server (ie sipwa1.simtex.com.au / sipwa2.simtex.com.au / sipnsw1.simtex.com.au)
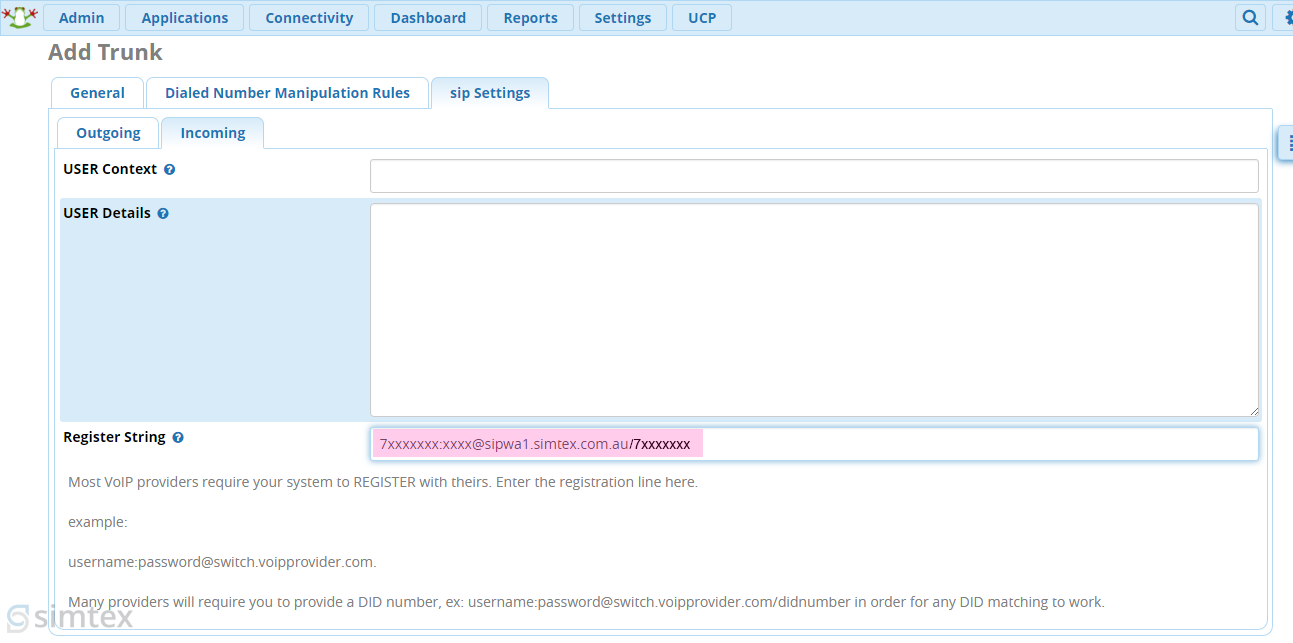
6. Click on Incoming tab
Clear out the data within USER details, enter the register string for the correct server/trunk you are setting up
7. Go back to step 1, and setup the 2nd and 3rd Simtex trunks
Reminder: Setup multiple trunks for each server as listed in the table on the top of the page
Outbound Route Configuration
In order to make outbound calls, your system needs to know what it’s allowed to route and where the calls are to be routed. We’ll set these up to guard against people making unauthorised calls on your system.
If you do not wish to make international calls, leave out the 0011 route pattern.
To save yourself from grief later down the track, configure a prefix to route all external calls. In Australia, we use 0 as a standard. This will ensure internal numbers will never overlap external destinations
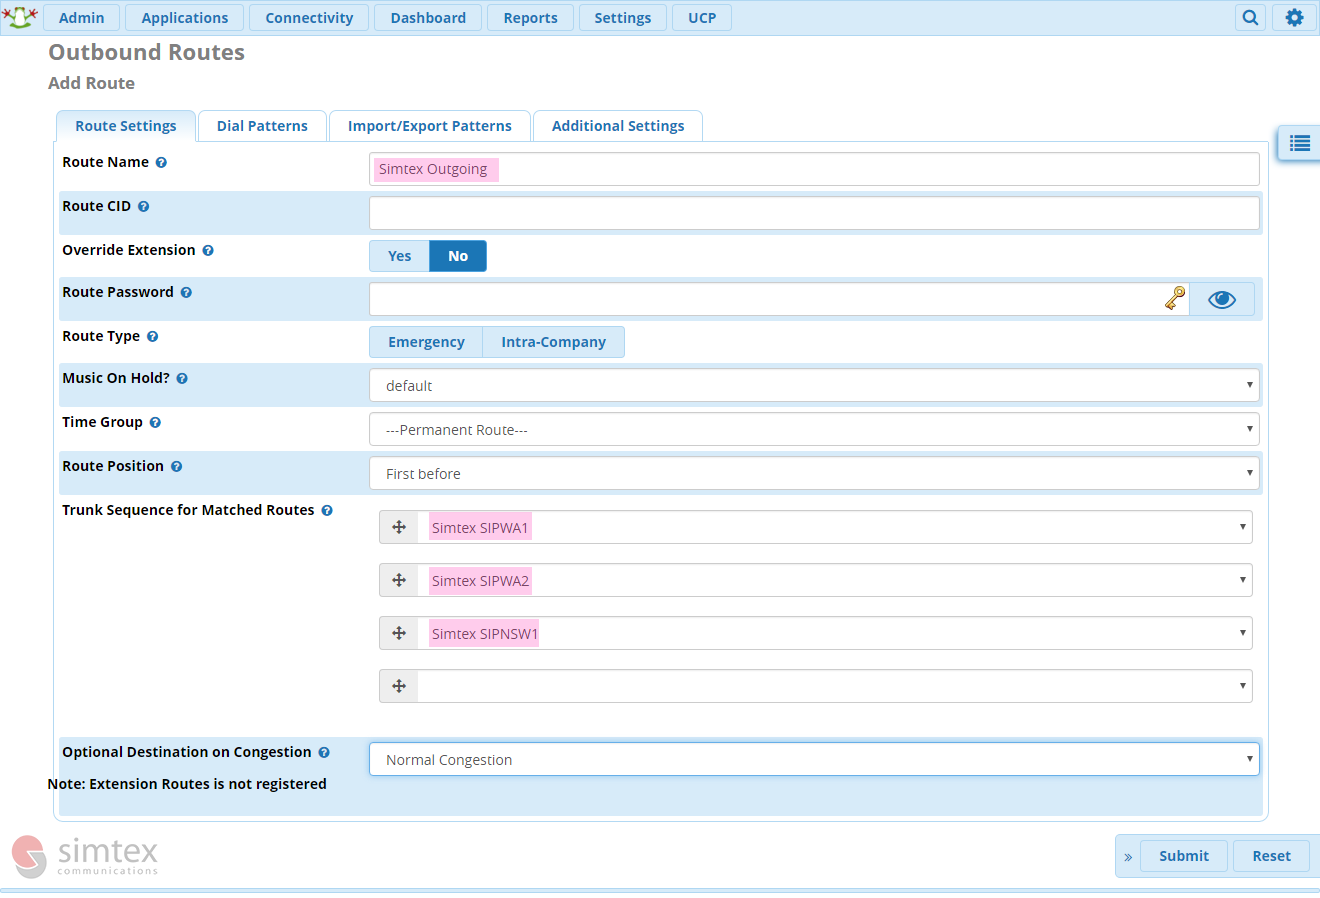
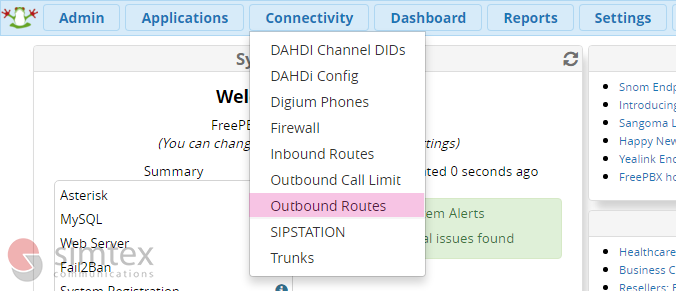
1. Within the Connectivity menu, select Outbound Routes and Add Outbound Route
2. Label your route, and select the servers in order depending on your location
