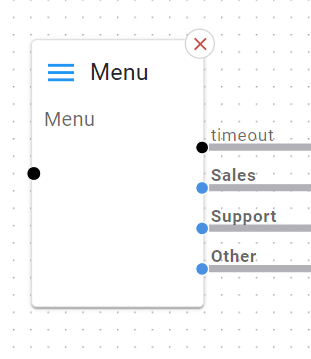
Menu Node
Plays an optional recorded prompt (like “Press 1 for Sales, 2 for Support…”) then branches the call based on the digit pressed by the caller.
Basic Usage
Drag a Menu node onto the canvas.
Wire the input (e.g., from Call Start) into the Menu node.
Select the audio prompt, click + Add and setup some digit options.
Save the node.
Wire each digit’s outcome to the desired next node.
Detailed Parameters
Node Name

What: Unique label for this specific node.
Why: So you can work out what the node does without having to click on it.
Tip: Give meaningful names as required.
Initial Audio Prompt
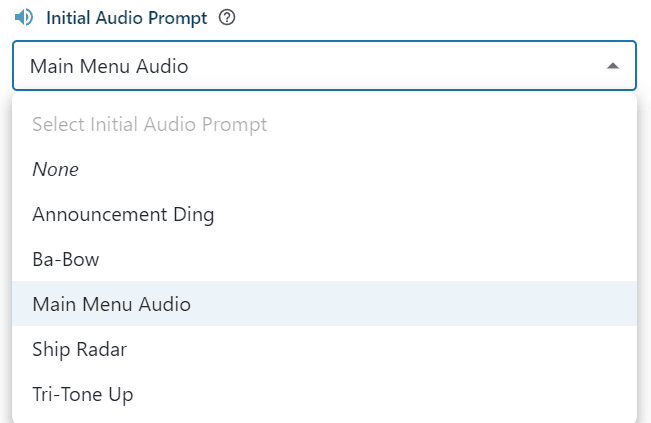
What: The prompt callers hear: “Thank you for calling… Press 1 for… etc.”
Why: So your callers know which digit to press.
Tip: Keep it short and sweet or your callers might fall asleep for forget what number they want!
Menu Options
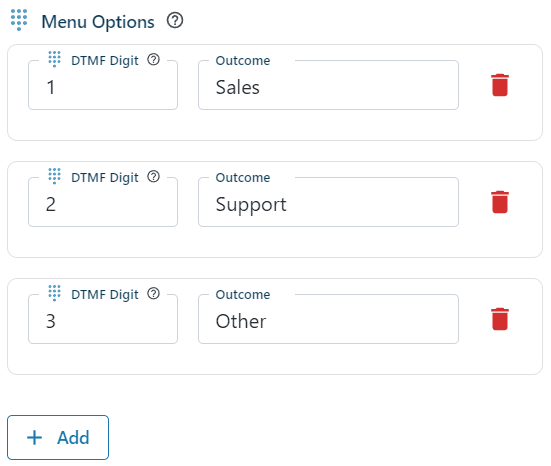
What: The digits (0-9) and what each digit leads to (e.g., “sales,” “support”).
Why: Tells the IVR which path to take when the user presses that digit.
Tip: You can define multiple digits. Just ensure none overlap.
Max Repeats

What: How many times the system repeats the menu prompt if a caller provides invalid or no input.
Default: Often 2 or 3.
Tip: If your callers are “digit-challenged,” you may want a higher repeat count.
Timeout (seconds)

What: How long to wait for input before taking the “timeout” path.
Tip: If you have mostly quick presses, keep it short (e.g., 5 seconds).
Example Use Case
Main IVR: The first node after “Call Start,” asking callers to select between departments.